As an experienced illustrator and perspectivist established in 1987, Sally has worked with architects, developers and private individuals producing technical perspective set ups from architects plans and elevations which she then watercolour renders. These can then be used to support planning applications and for marketing.
From the initial basic outline setup, then the detailed line drawing through to the water colour rendering, liaising with the clients at each stage.
Finally, the artwork is scanned and shared with the client, as well as the client receiving the original by next day post.

Sally enjoys the crispness and texture associated with a combination of sharp pencil outline and traditional watercolour washes on rich watercolour paper grounds. She uses this to great effect in portraying the essence of the English landscape and more traditionally detailed buildings. The overall feeling that this creates is that of a luminous English Summer.
Over the years working for architects and developers she has built a considerable portfolio demonstrating her competence and experience.
Sally is a fellow of The Society of Architectural Illustrators.
-

Process 1
The client provides plans, elevations and photos. Also, a postcode is useful so the site can be viewed on google earth. It’s necessary to work out what else will be in shot should it be other buildings or vegetation trees etc.
-

Process 2
The first stage is to size the architect’s drawings to a workable size to achieve the finished size required.
-

Process 3
Overlaying the base plan with colour coded lines and measurements ready for setting up.
-

Process 4
With the base plan ready it is then angled in the direction of the chosen view. The picture plane is set to the right position for the size required.
-

Process 5
Laying on a sheet of watercolour paper we are now ready to start setting up.
-

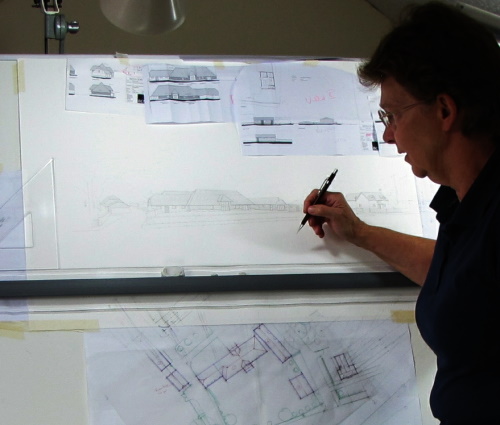
Process 6
A basic outline is produced first so that the client can be happy that the chosen view is achieving the required result.
-

Process 7
Once the client has signed off on the outline the detail is added.
-

Process 8
More detail added.
-

Process 9
Line drawing complete and ready for client’s approval.
-

Process 10
Line drawing complete and ready for client’s approval.
-

Process 11
It is necessary to wet the paper so that it doesn’t wrinkle during the painting procedure.
-

Process 12
When wet it is taped and pinned to the board.
-

Process 13
Once dry the pins can be removed.
-

Process 14
Several days later the painting is complete. It is important to mix colours to match the material and also to consider the distortions of the scanning process.
-

Process 15
Last checks before cutting the painting off the board.
-

Process 16
Cut to size
-

Process 17
Scanning. This process can be as many as 10 scans.
-

Process 18
The scanned pieces.
-

Process 19
The images are stitched back together and enhanced in photoshop.
Several versions will be made as the clients printer will give different results. A disc is burned with all available images on and posted with the original.
Meanwhile the best images are sent via ‘we transfer’ or email.
-

Process 20
The original is mounted ready for posting.
-

Process 21
Picture is tacked lightly to the mount.
-

Process 22
Ready for packing up.
-

Process 23
Preparing for posting.